Quick Start
- Visit https://blogs.depaul.edu/
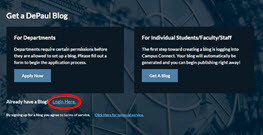
- For an Individual Blog, click the Get a Blog button. Or, for a Departmental Blog, click Apply Now.
- Log in with your Campus Connect username and password
- Pick your Site Title. Note: The Site Title will typically be displayed in your site’s header as well as serve as the title of your open browser tab. Your site's title can be changed at any time by going to the Dashboard > Settings > General.
- Click the Create Site button.
- Click on site URL to see your site. Note: If your site was not created, it is likely because there is an issue with the URL you are trying to create. An error message will appear below the field that needs to be corrected.
Logging In & Out
Logging In
To log into DePaul Blogs in the future: Visit https://blogs.depaul.edu/ Click Login Here, and log in using your Campus Connect username and password.
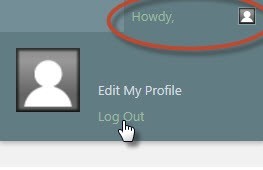
Logging Out
Navigate to the top right hand corner of your blog and move your mouse over your username. Click Log Out.
Dashboard
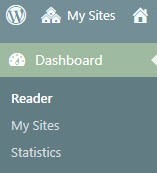
Your site is managed through a “Dashboard.” When you log in, your dashboard is visible on the left-hand side of the window. If the dashboard is not visible and you would like to access the dashboard, hover over “My Sites” on the toolbar at the top of your site. It will provide a drop down menu where you can access your Dashboard.
Customization of Theme
DePaul Theme
Your blog will be generated with the DePaul theme. You are unable to change the theme of your blog, but you may customize colors, header image, or background image. In the dashboard, click Appearance > Customize.

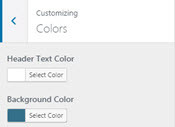
Customize Colors
You can change the background color of your site and the text color of posts. In the dashboard, clickAppearance > Customize > Colorsand choose text and background color.
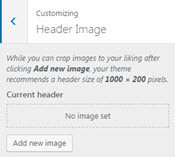
Change the Header Image
You can change the banner image at the top of the site. Click Appearance > Customize > Header Image. You can select a different default image, or upload an image of your own.
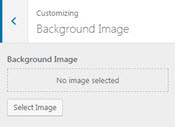
Add an Image to the Background
To add an image to the background, click Appearance > Customize > Background. Choose an image.
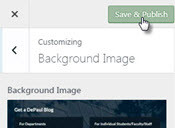
Save Customizations
After making changes, remember to click the Save & Publish button to save your custom changes.
Adding Pages
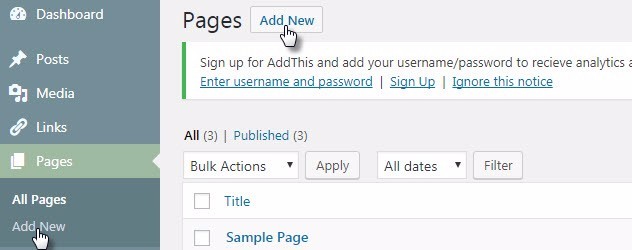
Pages are typically static content that gives visitors more information on the site. Pages are different from posts in a few ways. Each page created gets a unique place on your site with a unique URL, whereas posts populate the same area of the site. Posts will only be visible on the Home page. An About page is an example of a common static page on many sites. To add a new page, in the dashboard click Pages > Add New. Fill in the Title and body content.
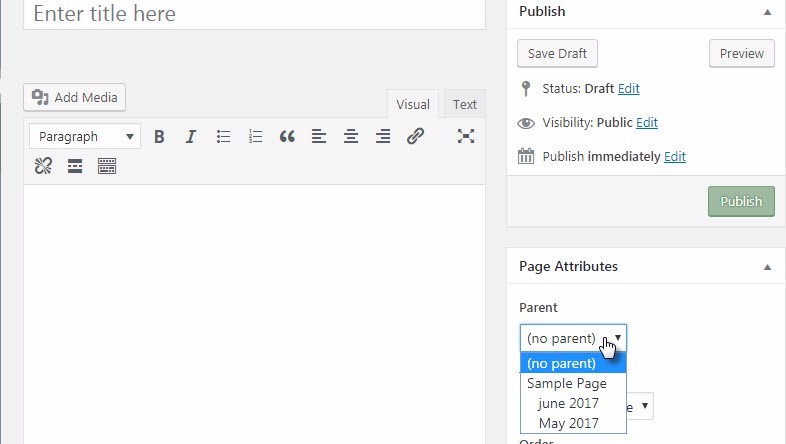
Adding Subpages
You can also add subpages under parent pages. A parent page is a page containing the main theme content. Subpages address specific themes from the larger set addressed from the parent page. To create a subpage, first create a new page. Then, under the Page Attributes section, choose a Parent page. This new page will now be found under the selected parent page.
Posting
Blog posts are featured on the homepage of your site. To add a new post go to Posts > Add New. This will take you to the page where you will create your post. You should select a title, add content in the post field using the rich text editor, add a category and/or tags, and publish.

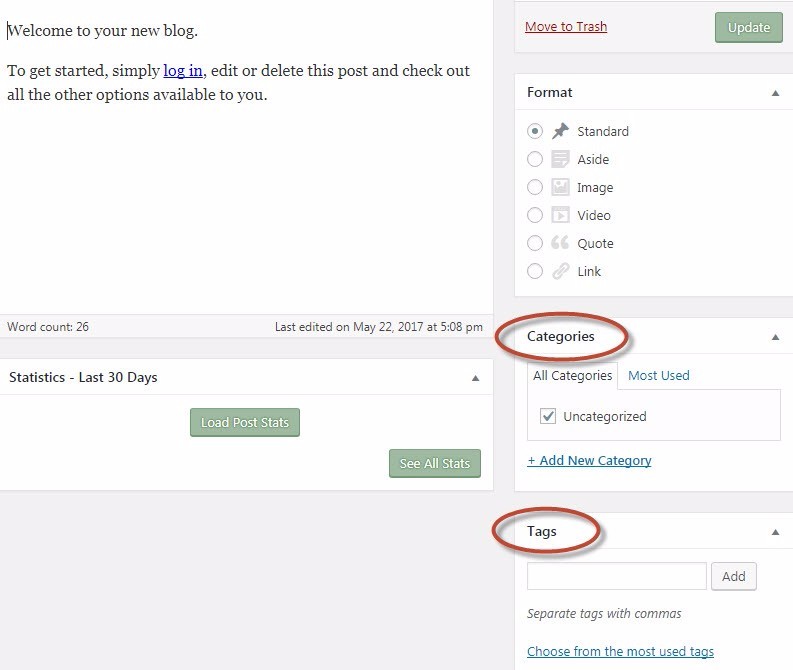
Categories and Tags
One of the many features of a blog is the ability to categorize your posts based on the concepts of “Categories and Tags.” Categories are broad groupings of post types. For example, if you are blogging about your study abroad experience, you might categorize all of these posts as “study abroad”. Tags are more specific to the content of the post. So if you wrote a specific post about trying new foods while studying abroad in Spain, you could tag the post as "Spain", "Europe", and "food". Categories are useful on your blog when readers visit and want to view similar posts. Tags are useful to find specific posts and for searching on DePaul Blogs.
Embedding Media
You may want to include an image, audio file, or video in your post. If so, there are two ways to add media on your site:
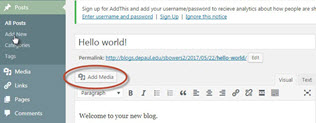
Add Media Directly to Post
You can directly embed the media while creating a new post by clicking the Add Media button when creating a post. Add New Post>Add Media>Select Files.
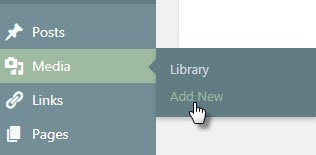
Add Media to Media Library
You can also add media to your Media Library for later use. In your dashboard click Media>Library>Add New. Here you can manage your media by changing the title, description, and deleting it.
Edit or Delete a Post
To Edit a Post: You may edit your post by going to Dashboard > Posts. Hover over the name of the post you would like to edit. Click the Edit link wich will appear directly underneath the title of the post.
To Delete a Post: You may delete your post by going to Dashboard > Posts. To delete a post, hover over the name of the post you would like to delete. Click the Trash link which will app ear directly underneath the title of the post.

Terms of Service
To read the DePaul Blogs terms of use, please visit https://blogs.depaul.edu/terms-of-service/
Departmental Blogs
Departments require certain permissions before they are allowed to set up a blog. Please fill out a Departmental Blogs Request Form to begin the application process.